
Using fire to control weeds may sound risky, especially in mulched areas. Yet, with the right technique and knowledge, a flame weeder can become a safe and effective tool.
Many gardeners and land managers are drawn to flame weeding because it avoids chemical herbicides, works quickly, and can reach spots that are hard to weed by hand.
But mulch is flammable by nature, so one wrong move can cause more harm than good. Understanding how to use a flame weeder in mulch safely is not just important—it’s essential.
Safety concerns often stop beginners before they start. Stories of scorched plants, singed mulch, or worse, unintentional fires, are common. But most accidents happen because of missed steps, overlooked details, or lack of planning.
This guide will walk you through every part of using a flame weeder in mulched beds, from the science of how it works to the final safety checks.
You’ll find real-world examples, expert tips, and comparisons to help you make smart, safe choices.
Understanding Flame Weeding

Flame weeding is a method that uses intense heat from a propane torch to damage or kill weeds. The process doesn’t burn the plants to ash; instead, it heats the plant cells so that they burst, which destroys the plant’s ability to retain water. Over the next few days, the weed withers and dies.
Flame weeders are often used in organic gardening, agriculture, and landscape management. They are especially helpful for controlling weeds in driveways, garden beds, and around obstacles where mechanical tools can’t reach.
Also Read: How to Fix a Leaking Garden Sprayer Nozzle?
How A Flame Weeder Works?
A typical flame weeder consists of a propane tank, a hose, and a torch head. When you ignite the torch, it creates a controlled flame. The goal is not to set the weed or mulch on fire, but to pass the flame over the weed quickly. This heat damages the plant cells without causing ignition.
Flame weeders vary in size:
- Hand-held torches for small gardens
- Backpack models for larger areas
- Cart-mounted versions for farms
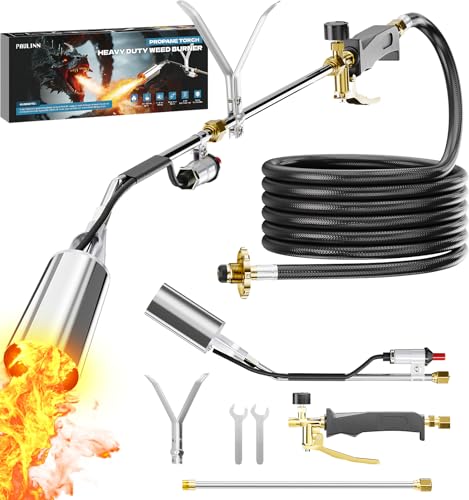
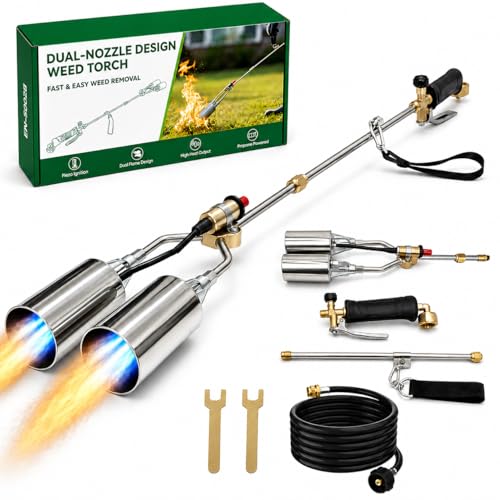
Flame Weeders You Can Buy


The Risks Of Using Flame Weeders In Mulch
While flame weeders are safe when used correctly, mulch adds extra risk. Mulch is made from organic material like wood chips, bark, straw, or leaves—all of which are flammable.
Here are the main dangers:
- Mulch ignition: Even brief contact with a flame can start a slow, smoldering fire.
- Wind spread: Wind can blow burning mulch into other areas.
- Root and plant damage: Too much heat can harm nearby plants.
- Hidden embers: Mulch fires may smolder underground and re-ignite later.
According to the National Fire Protection Association, mulch fires are a leading cause of landscape fires in dry seasons, often caused by carelessness with open flames.
Choosing The Right Mulch For Flame Weeding
Not all mulches are equal when it comes to flame weeding. Some mulches are more fire-resistant than others.
| Mulch Type | Flammability | Recommended for Flame Weeding? |
|---|---|---|
| Wood chips | High | No |
| Bark mulch | High | No |
| Pine needles | Very High | No |
| Compost mulch | Low | Yes |
| Gravel/Stone | None | Yes |
| Rubber mulch | Extreme | No |
| Leaf mulch | Moderate | Use Caution |
Stone and compost mulches are safest for flame weeding. Wood chips, bark, and rubber mulches are highly flammable and should be avoided.
Preparing The Area For Safe Flame Weeding
Preparation is the foundation of safe flame weeding in mulched beds. Skipping these steps increases your risk of fire.
- Check moisture levels: Mulch is less likely to ignite if it’s moist. Flame weeding on a dry, windy day is dangerous.
- Water the mulch: Lightly spray the area with water before you start. The mulch should be damp, not soggy.
- Clear away excess mulch: Rake mulch away from the weeds you plan to flame, exposing soil where possible.
- Remove debris: Pick up sticks, leaves, or trash that could catch fire.
- Create a safety zone: Wet a 12-24 inch border around the work area to stop fire spread.
Pro Tip: Timing Matters
Flame weeding is safest:
- Early in the morning, when dew is present
- After recent rain
- On calm, cool days with little wind
Never use a flame weeder during drought, high winds, or heat waves.
Choosing And Maintaining Your Flame Weeder
The right tool makes a huge difference. Not all flame weeders are suitable for mulched beds.
Features To Look For
- Adjustable flame control: Lets you use a lower, safer heat setting.
- Trigger start: Easier and safer than using a lighter.
- Long hose or wand: Keeps you farther from the flame.
- Built-in safety shut-off: Quickly stops the gas if needed.
Maintenance Tips
- Check for leaks: Inspect hoses and connections before each use.
- Clean the nozzle: Ash or debris can block the flame.
- Store propane safely: Keep tanks upright, outdoors, and away from heat.
Regular maintenance not only extends the tool’s life but also prevents accidents.
Step-by-step Guide: Safe Flame Weeding In Mulch
Follow these steps every time you use a flame weeder in mulch.
1. Inspect Your Equipment
- Check all connections for leaks.
- Make sure the torch tip is clean and free of debris.
- Test the trigger and flame control before starting.
2. Prepare The Area
- Water the mulch and nearby plants.
- Rake mulch away from weeds when possible.
- Remove any flammable debris.
3. Wear Proper Safety Gear
- Flame-resistant gloves
- Long-sleeved cotton shirt and pants
- Closed-toe shoes
- Safety goggles
- A hat or head covering
Avoid synthetic clothing—it can melt.
4. Keep Fire Safety Tools Nearby
- Garden hose or bucket of water
- Fire extinguisher (ABC-rated is best)
- Rake or shovel to move burning material
5. Ignite The Flame Weeder
- Turn on the gas supply slowly.
- Ignite the torch following manufacturer instructions.
- Adjust the flame to a low or medium setting.
6. Apply The Flame To Weeds
- Hold the torch 2-3 inches above the weed.
- Sweep the flame over the weed for 1-2 seconds.
- The goal is to wilt, not burn. The weed should darken and wilt, not ignite.
- Move slowly and deliberately.
7. Monitor Mulch For Hot Spots
- Watch for smoldering or smoke.
- If mulch starts to smoke, douse with water immediately.
- Check for hidden embers by raking through the mulch after flaming.
8. Work In Small Sections
- Only flame weed a few square feet at a time.
- Pause often to check for hot spots or signs of ignition.
9. Do A Final Safety Check
- After finishing, inspect the area for at least 30 minutes.
- Water the area again to ensure all embers are out.
Common Mistakes And How To Avoid Them
Many accidents happen from simple mistakes. Here’s what to watch for:
- Flaming too long in one spot: Holding the torch still increases the risk of ignition. Always keep the flame moving.
- Not wetting the mulch: Dry mulch catches fire much more easily.
- Ignoring the weather: Wind can blow flames or embers. Wait for calm conditions.
- Working too close to plants: The heat can damage roots and stems.
- Not having water ready: Always be prepared to put out a fire quickly.
One insight many beginners miss: mulch can smolder underground. Even if you see no flames, roots or mulch layers can hold heat. Always check under the mulch after flaming.
Comparing Flame Weeding To Other Weed Control Methods
Is flame weeding really worth the risk in mulch? Compare it with other common methods.
| Method | Effectiveness | Speed | Safety in Mulch | Chemical-Free |
|---|---|---|---|---|
| Flame weeder | High | Fast | Medium (if careful) | Yes |
| Hand pulling | Medium | Slow | High | Yes |
| Herbicide spray | High | Fast | High | No |
| Hoeing | Medium | Medium | Medium | Yes |
| Boiling water | Low | Slow | High | Yes |
Flame weeding is best for fast, chemical-free control, but requires more caution in mulched areas.
Real-world Examples And Data
A 2017 study from the University of Nebraska showed that flame weeding can reduce weed populations by over 80% when done correctly. However, the same study found that in dry, mulched beds, the risk of mulch ignition was four times higher than in bare soil.
Case example: A community garden in Oregon switched to flame weeding for their paths but only used it after heavy rain. Over two years, they reported no mulch fires and a noticeable drop in weed problems.
One non-obvious insight: Not all mulch fires are visible right away. Sometimes, mulch begins to smolder and only bursts into flame hours later. Always check the area again later in the day, especially during dry weather.
Legal And Environmental Considerations
Many towns and cities have rules about using open flame outdoors. Some areas require permits, especially during dry seasons. Always check your local fire regulations before using a flame weeder.
Environmental Impacts
Flame weeding does not leave chemical residues, but it does release a small amount of carbon dioxide from burning propane. This is much less than the carbon footprint of producing and transporting chemical herbicides.
One practical tip: If you want to reduce emissions, use a smaller torch and work more slowly. This uses less fuel overall.
What To Do If Mulch Catches Fire?
Even with care, accidents can happen. If mulch ignites:
- Stay calm. Do not panic.
- Use water first. Pour water directly on the burning mulch.
- Smother with soil. If water is not enough, cover the fire with damp soil.
- Do not use your hands. Use a shovel or rake to spread out the mulch and expose hot spots.
- Call for help if you cannot control the fire in a few minutes.
After the fire is out, check for hot spots by raking through the area and applying more water.
Advanced Tips For Experienced Users
- Use a thermal camera (if available) to check for hidden hot spots under mulch after flaming.
- Try alternating flame weeding with other methods (like hand pulling) to reduce risk.
- Mark off mulched beds with non-flammable borders (like stone or metal edging) to contain any accidental fire.
- Consider using a flame shield—a metal plate that attaches to the torch head and directs heat downward, reducing stray flames.
- Schedule flame weeding sessions right after irrigation for maximum safety.
When Not To Use A Flame Weeder In Mulch
There are times when flame weeding is simply too risky:
- During local fire bans or “red flag” warnings
- In beds with rubber or synthetic mulch
- When mulch is bone-dry or wind is high
- Close to buildings, fences, or other flammable structures
- Near conifer trees or shrubs (their resins are highly flammable)
In these cases, choose another weed control method.
Final Safety Checklist
Before you start:
- Is your equipment in good condition?
- Is the mulch moist?
- Are fire safety tools ready?
- Is the weather calm and cool?
- Are there children, pets, or bystanders nearby? (Keep them away.)
After you finish:
- Did you check for smoldering mulch or embers?
- Did you water the area again?
- Did you inspect the site 30 minutes later?
Every step matters. Most accidents come from skipping one simple part of the process.
Frequently Asked Questions
Is It Safe To Use A Flame Weeder In Wood Chip Mulch?
Using a flame weeder in wood chip mulch is risky because wood chips catch fire easily. If you must use a flame weeder, wet the mulch thoroughly, move chips away from weeds, and have water ready. However, for the safest results, use alternative weed control methods in wood chip beds.
How Wet Should The Mulch Be Before Flame Weeding?
The mulch should be damp to the touch, not soaking. Lightly spray the area until the mulch darkens, but avoid puddles. Wet mulch reduces the risk of ignition, but too much water can cause steam burns or uneven heating.
Can I Use A Flame Weeder Around Vegetables?
Yes, but be extra careful. Keep the flame at least 6 inches from plant stems and leaves. Always wet the mulch and soil before flaming, and avoid flaming on windy days. Consider using a flame shield to direct heat away from crops.
What Is The Best Time Of Day For Flame Weeding In Mulch?
Early morning is best, especially if dew is present. Avoid flaming during the heat of the day, in the afternoon, or when mulch is dry. Flame weeding just after a rain shower is safest.
Where Can I Learn More About Flame Weeding Safety?
For more detailed guidance, visit University of Minnesota Extension, which provides research-based safety tips and best practices for flame weeding.
Flame weeding in mulch is a powerful, chemical-free way to manage weeds, but it demands respect and preparation. When you follow the right steps, stay alert, and understand the risks, you can keep your landscape healthy without putting your property in danger.
Use these guidelines every time, and you’ll find flame weeding both safe and effective, even in mulched areas.
Sabbir Ahmed is an experienced gardener and the lead voice behind GardenToolsGuide.com, where he combines over 15 years of hands-on horticultural expertise with a passion for sustainable cultivation. Specializing in organic soil health and permaculture, Sabbir has dedicated his career to testing and refining the best methods for maintaining thriving green spaces. His mission is to simplify the complexities of gardening by providing practical, tool-focused advice that helps fellow enthusiasts—from beginners to seasoned pros—grow nutrient-dense food and beautiful landscapes with efficiency and ease.